Tag Archives: diy

The Pup Tent

Processed with VSCOcam with f2 preset

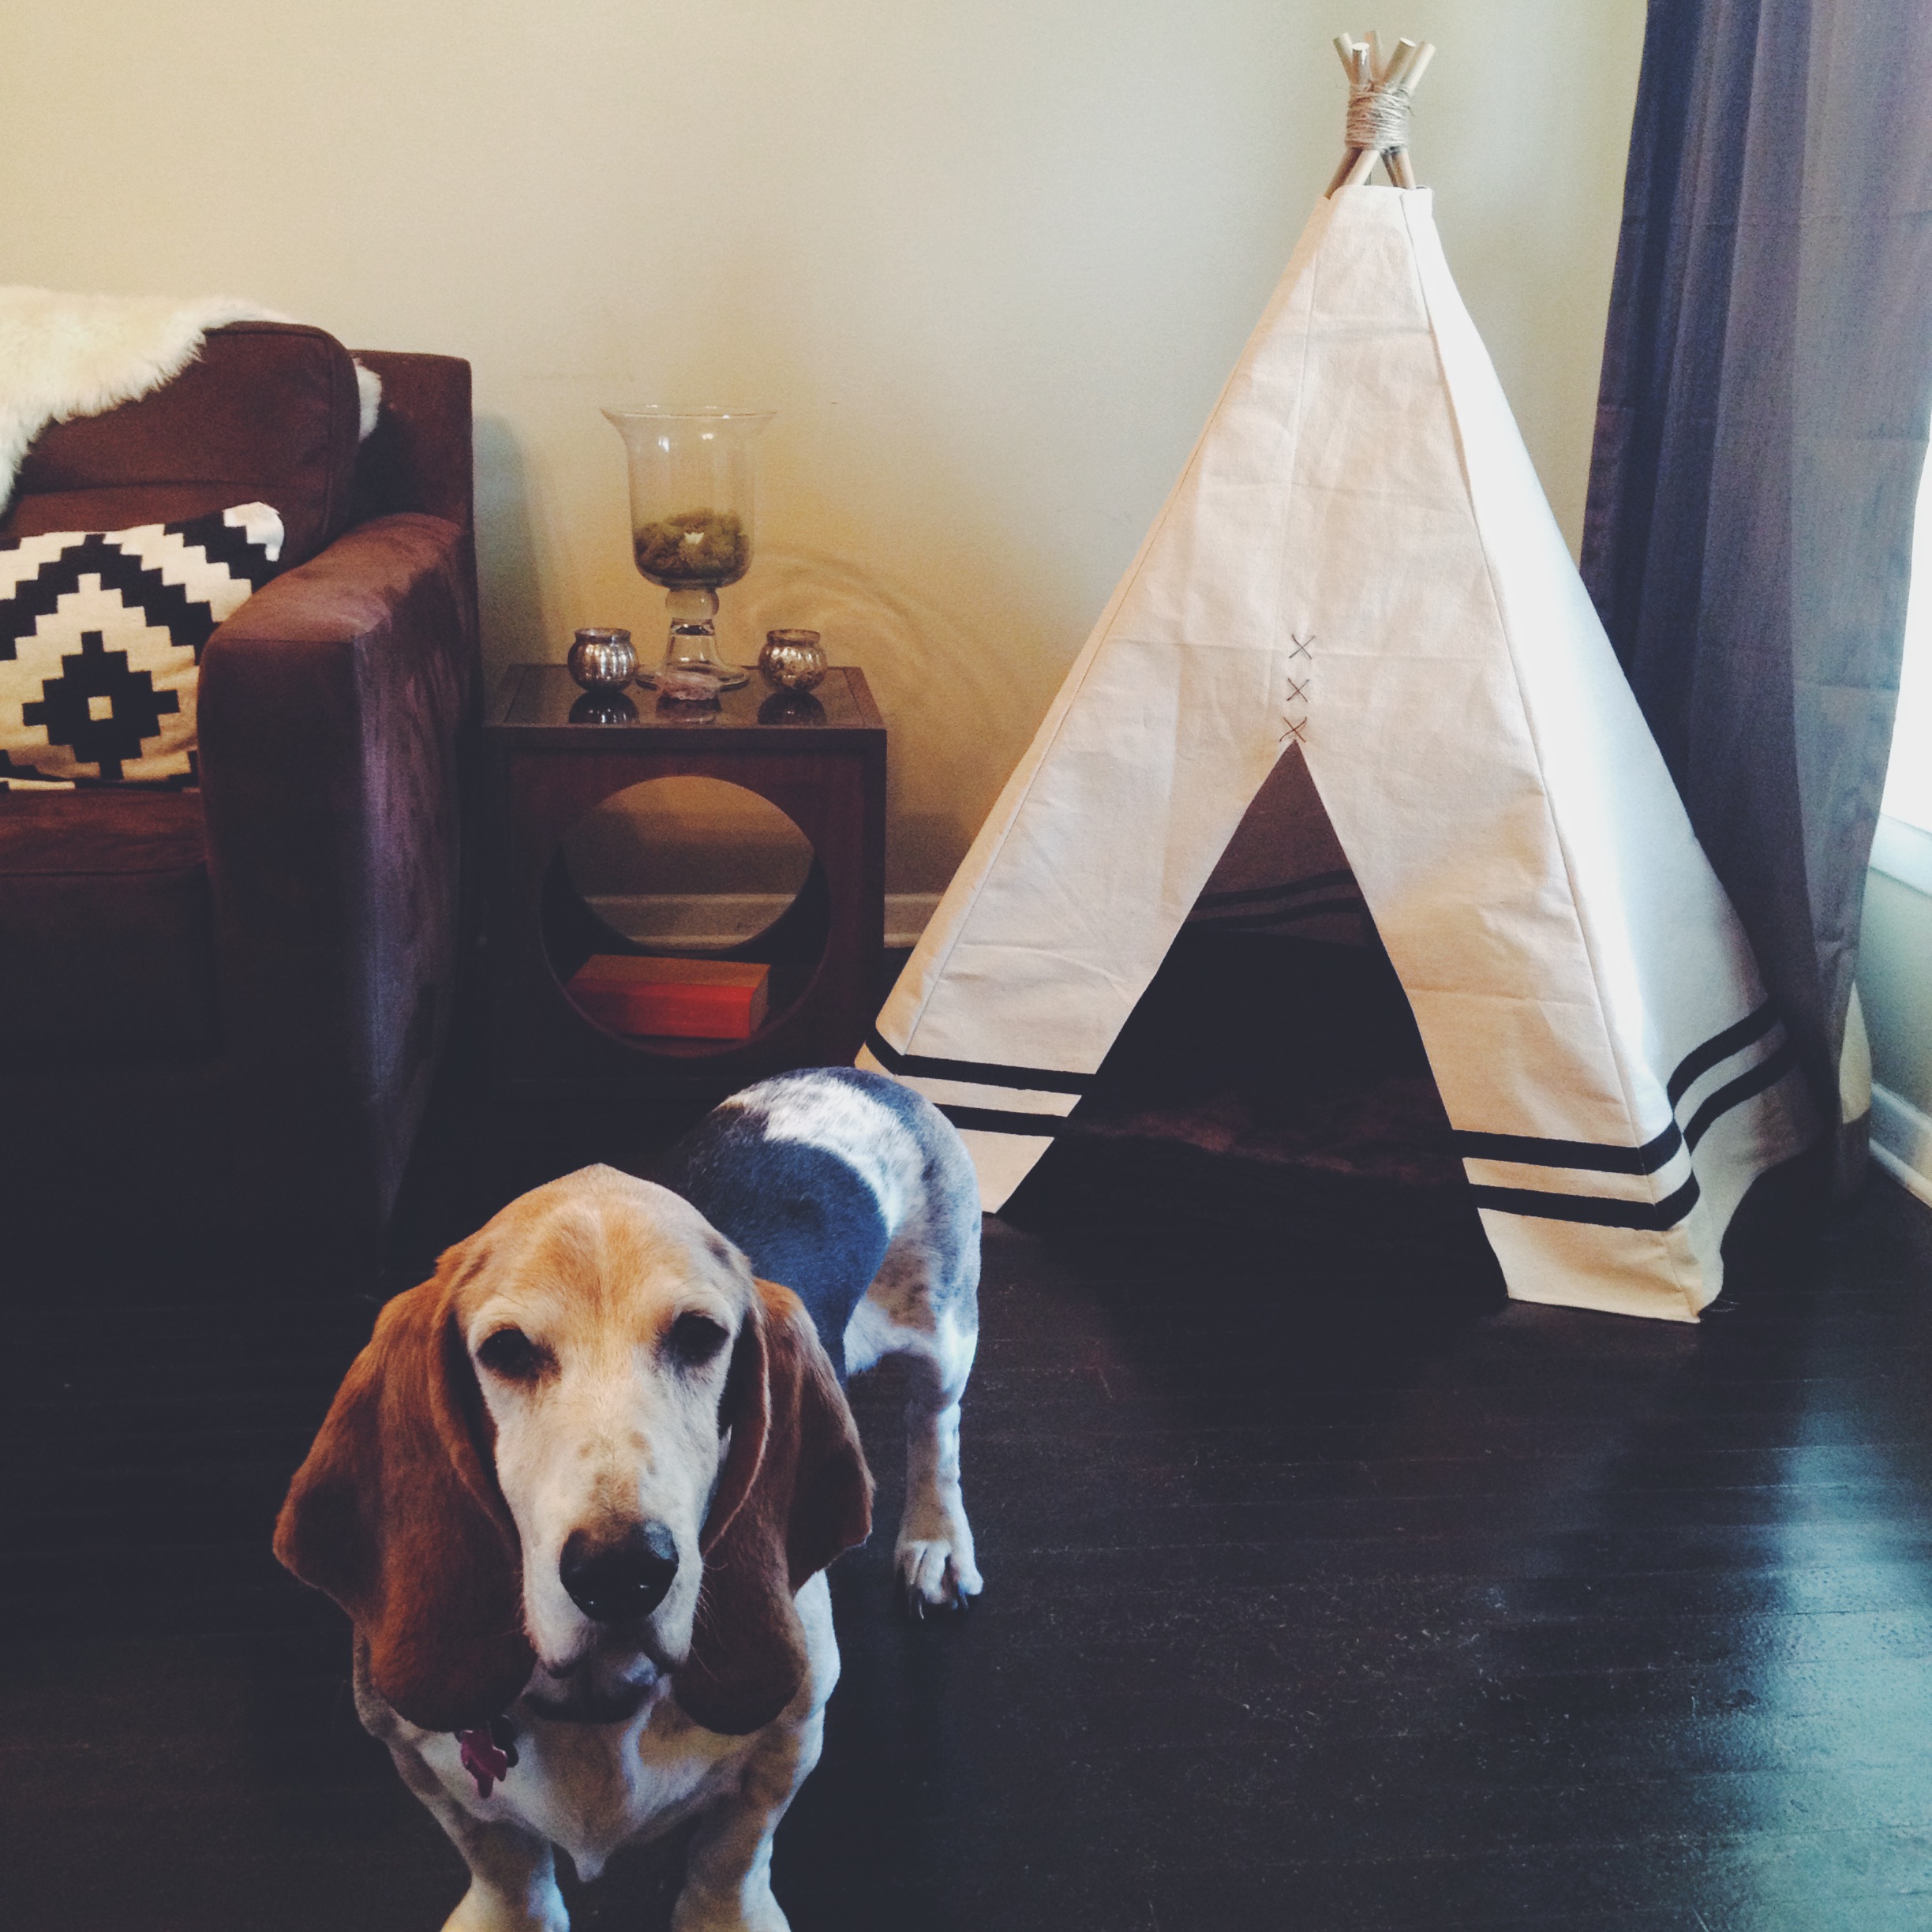
I had a crazy bout of inspiration this past weekend which resulted in this ridiculous and adorable doggie teepee. I’ve seen teepees and tents cropping up a lot online lately and always thought they were kind of cute, but I figured it would be silly to make myself a teepee. (I still really want a backyard yurt, but that’s for “someday.”)

Then I saw a doggie teepee in one of the instagram feeds I follow and I decided that yes, of course, my Henry dog definitely needed a teepee.

Processed with VSCOcam with m3 preset

I just decided to wing it on the construction- I grabbed a few 38” long dowels, some jute twine and a canvas drop cloth at the hardware store. The hardest part was figuring out how to do the cover. I didn’t want to just drape the fabric over the frame so I decided to bring out the sewing machine and sew a bunch of triangles together. I also decided to paint some black stripes along the bottom and stitch on a few reinforcements above the slit for the opening.

Processed with VSCOcam with f2 preset

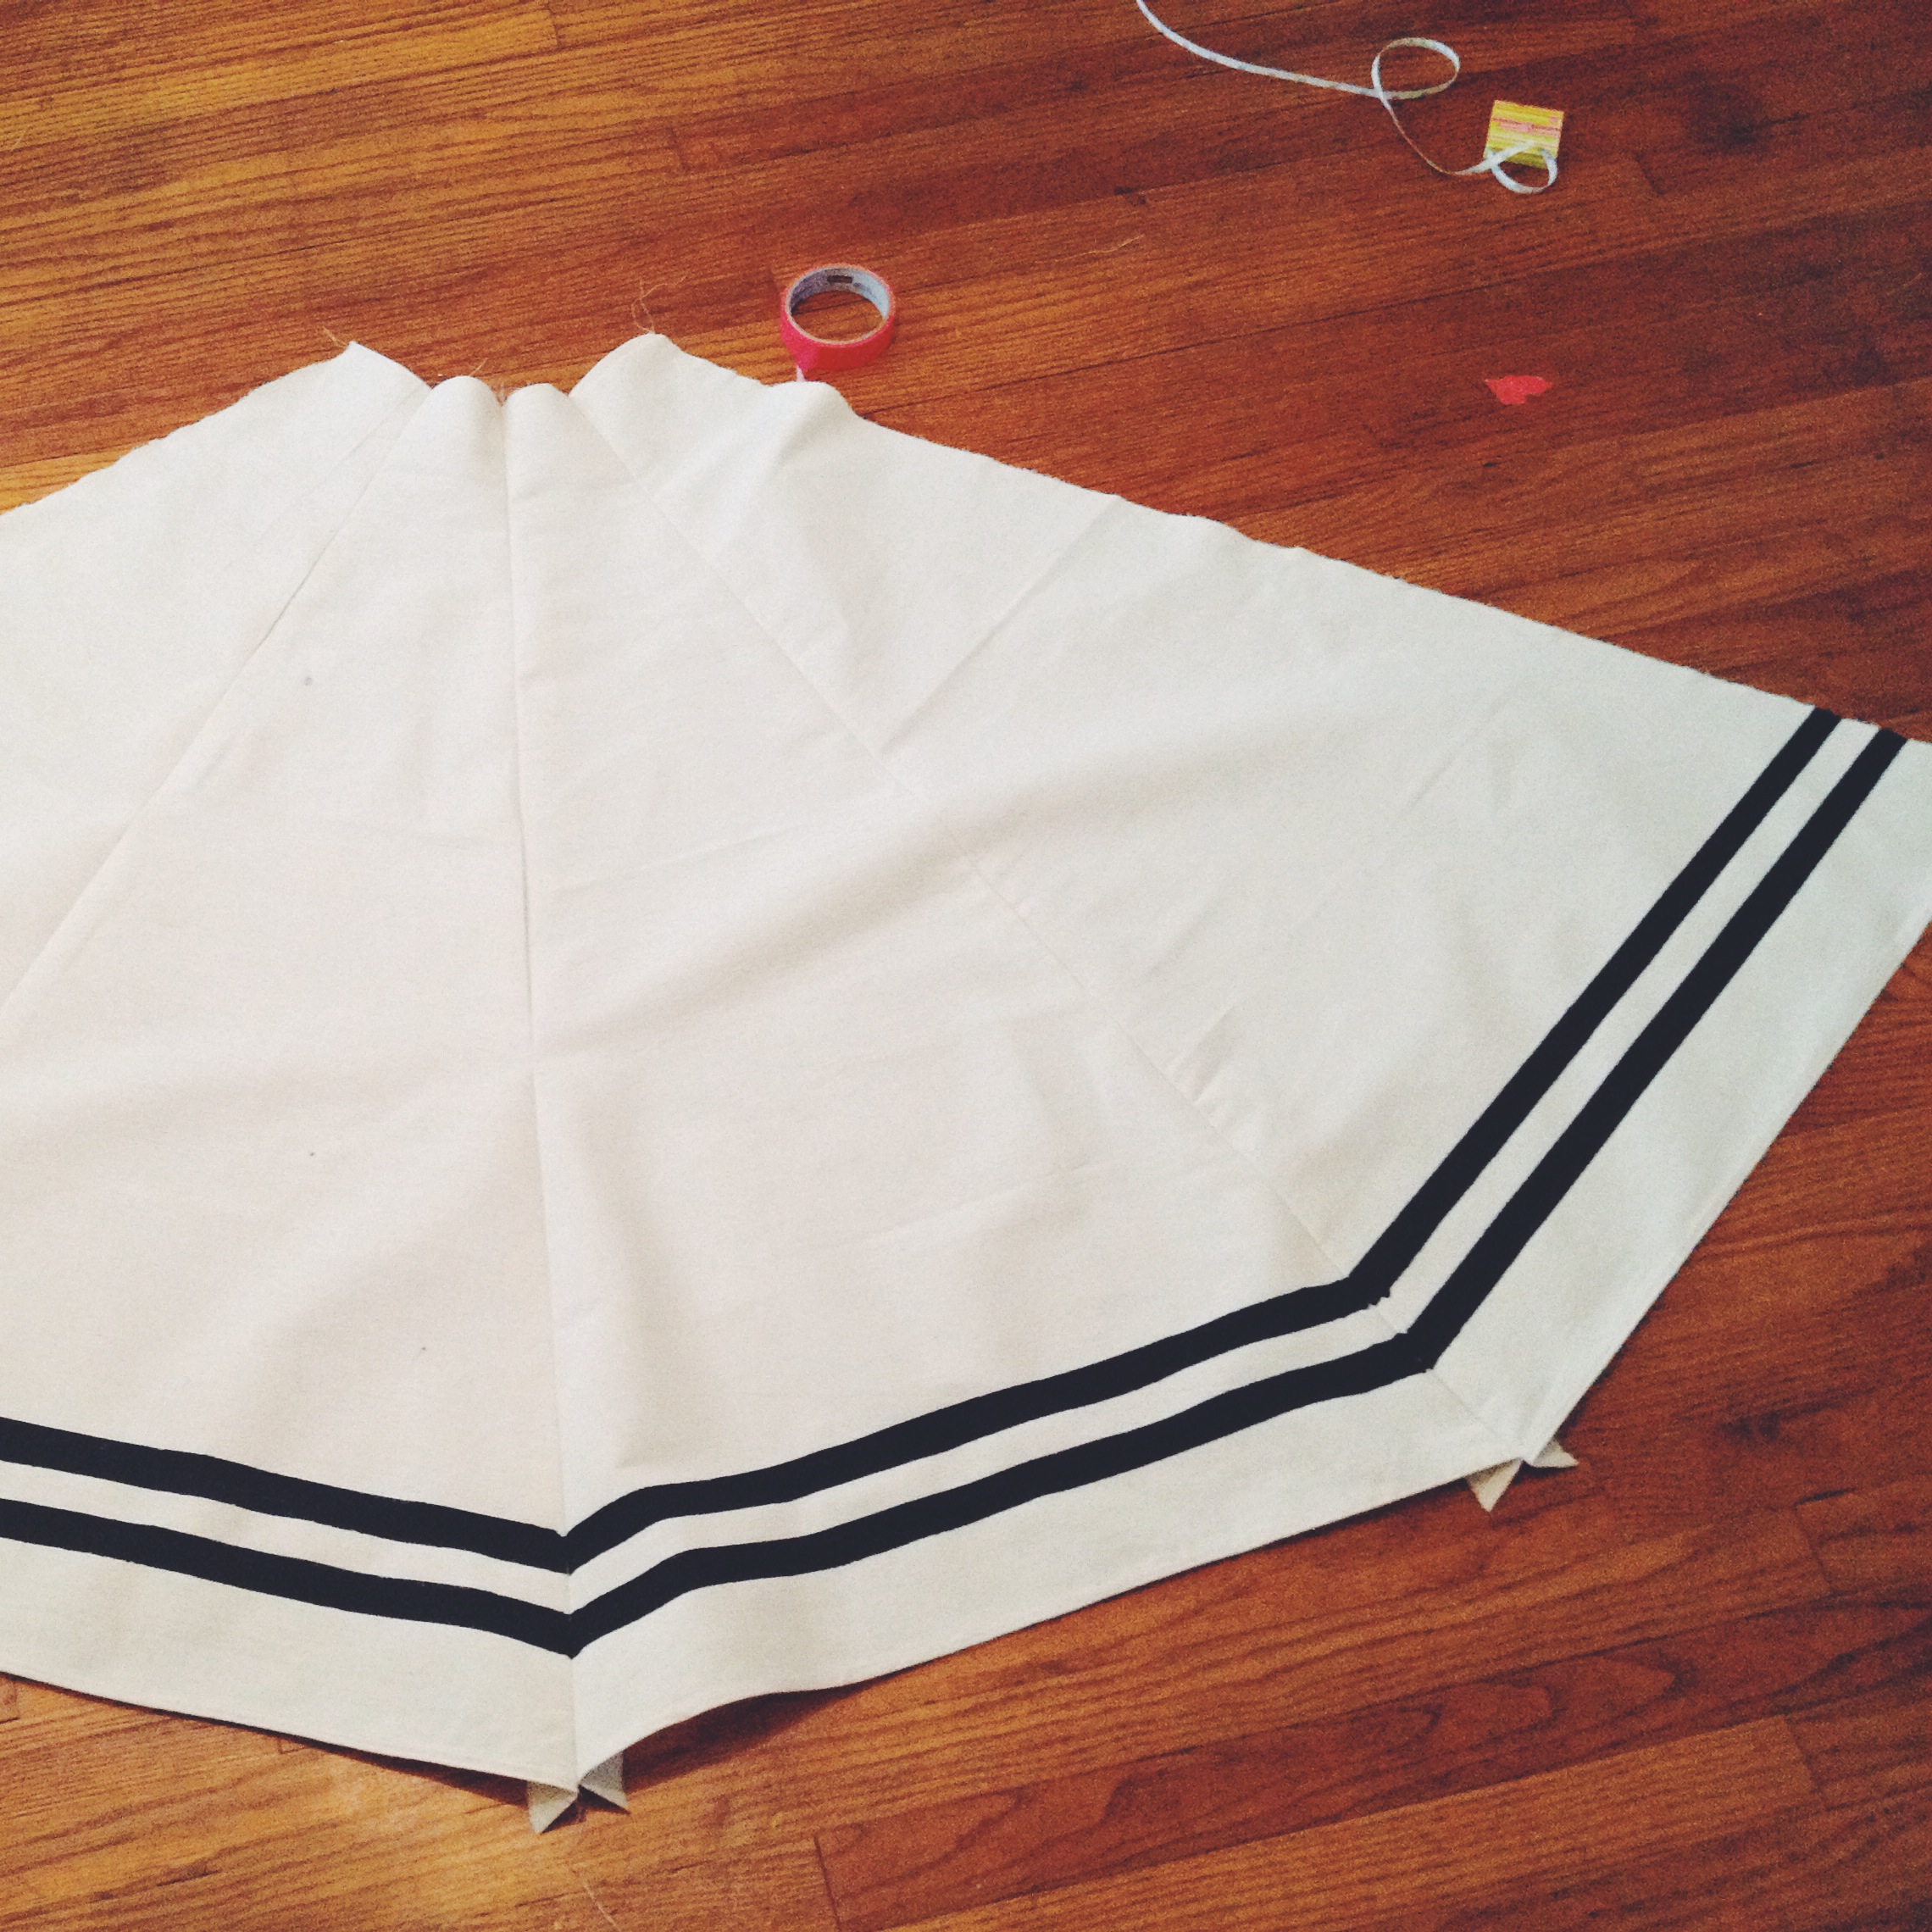
It’s not perfect- I’m too impatient when it comes to sewing to care about making sure my seams are lined up. Heck I didn’t even properly measure before I started cutting out the fabric pieces. Such is life when it comes to inspiration. No stopping to plan or measure, just make, make, make.

Processed with VSCOcam with f2 preset

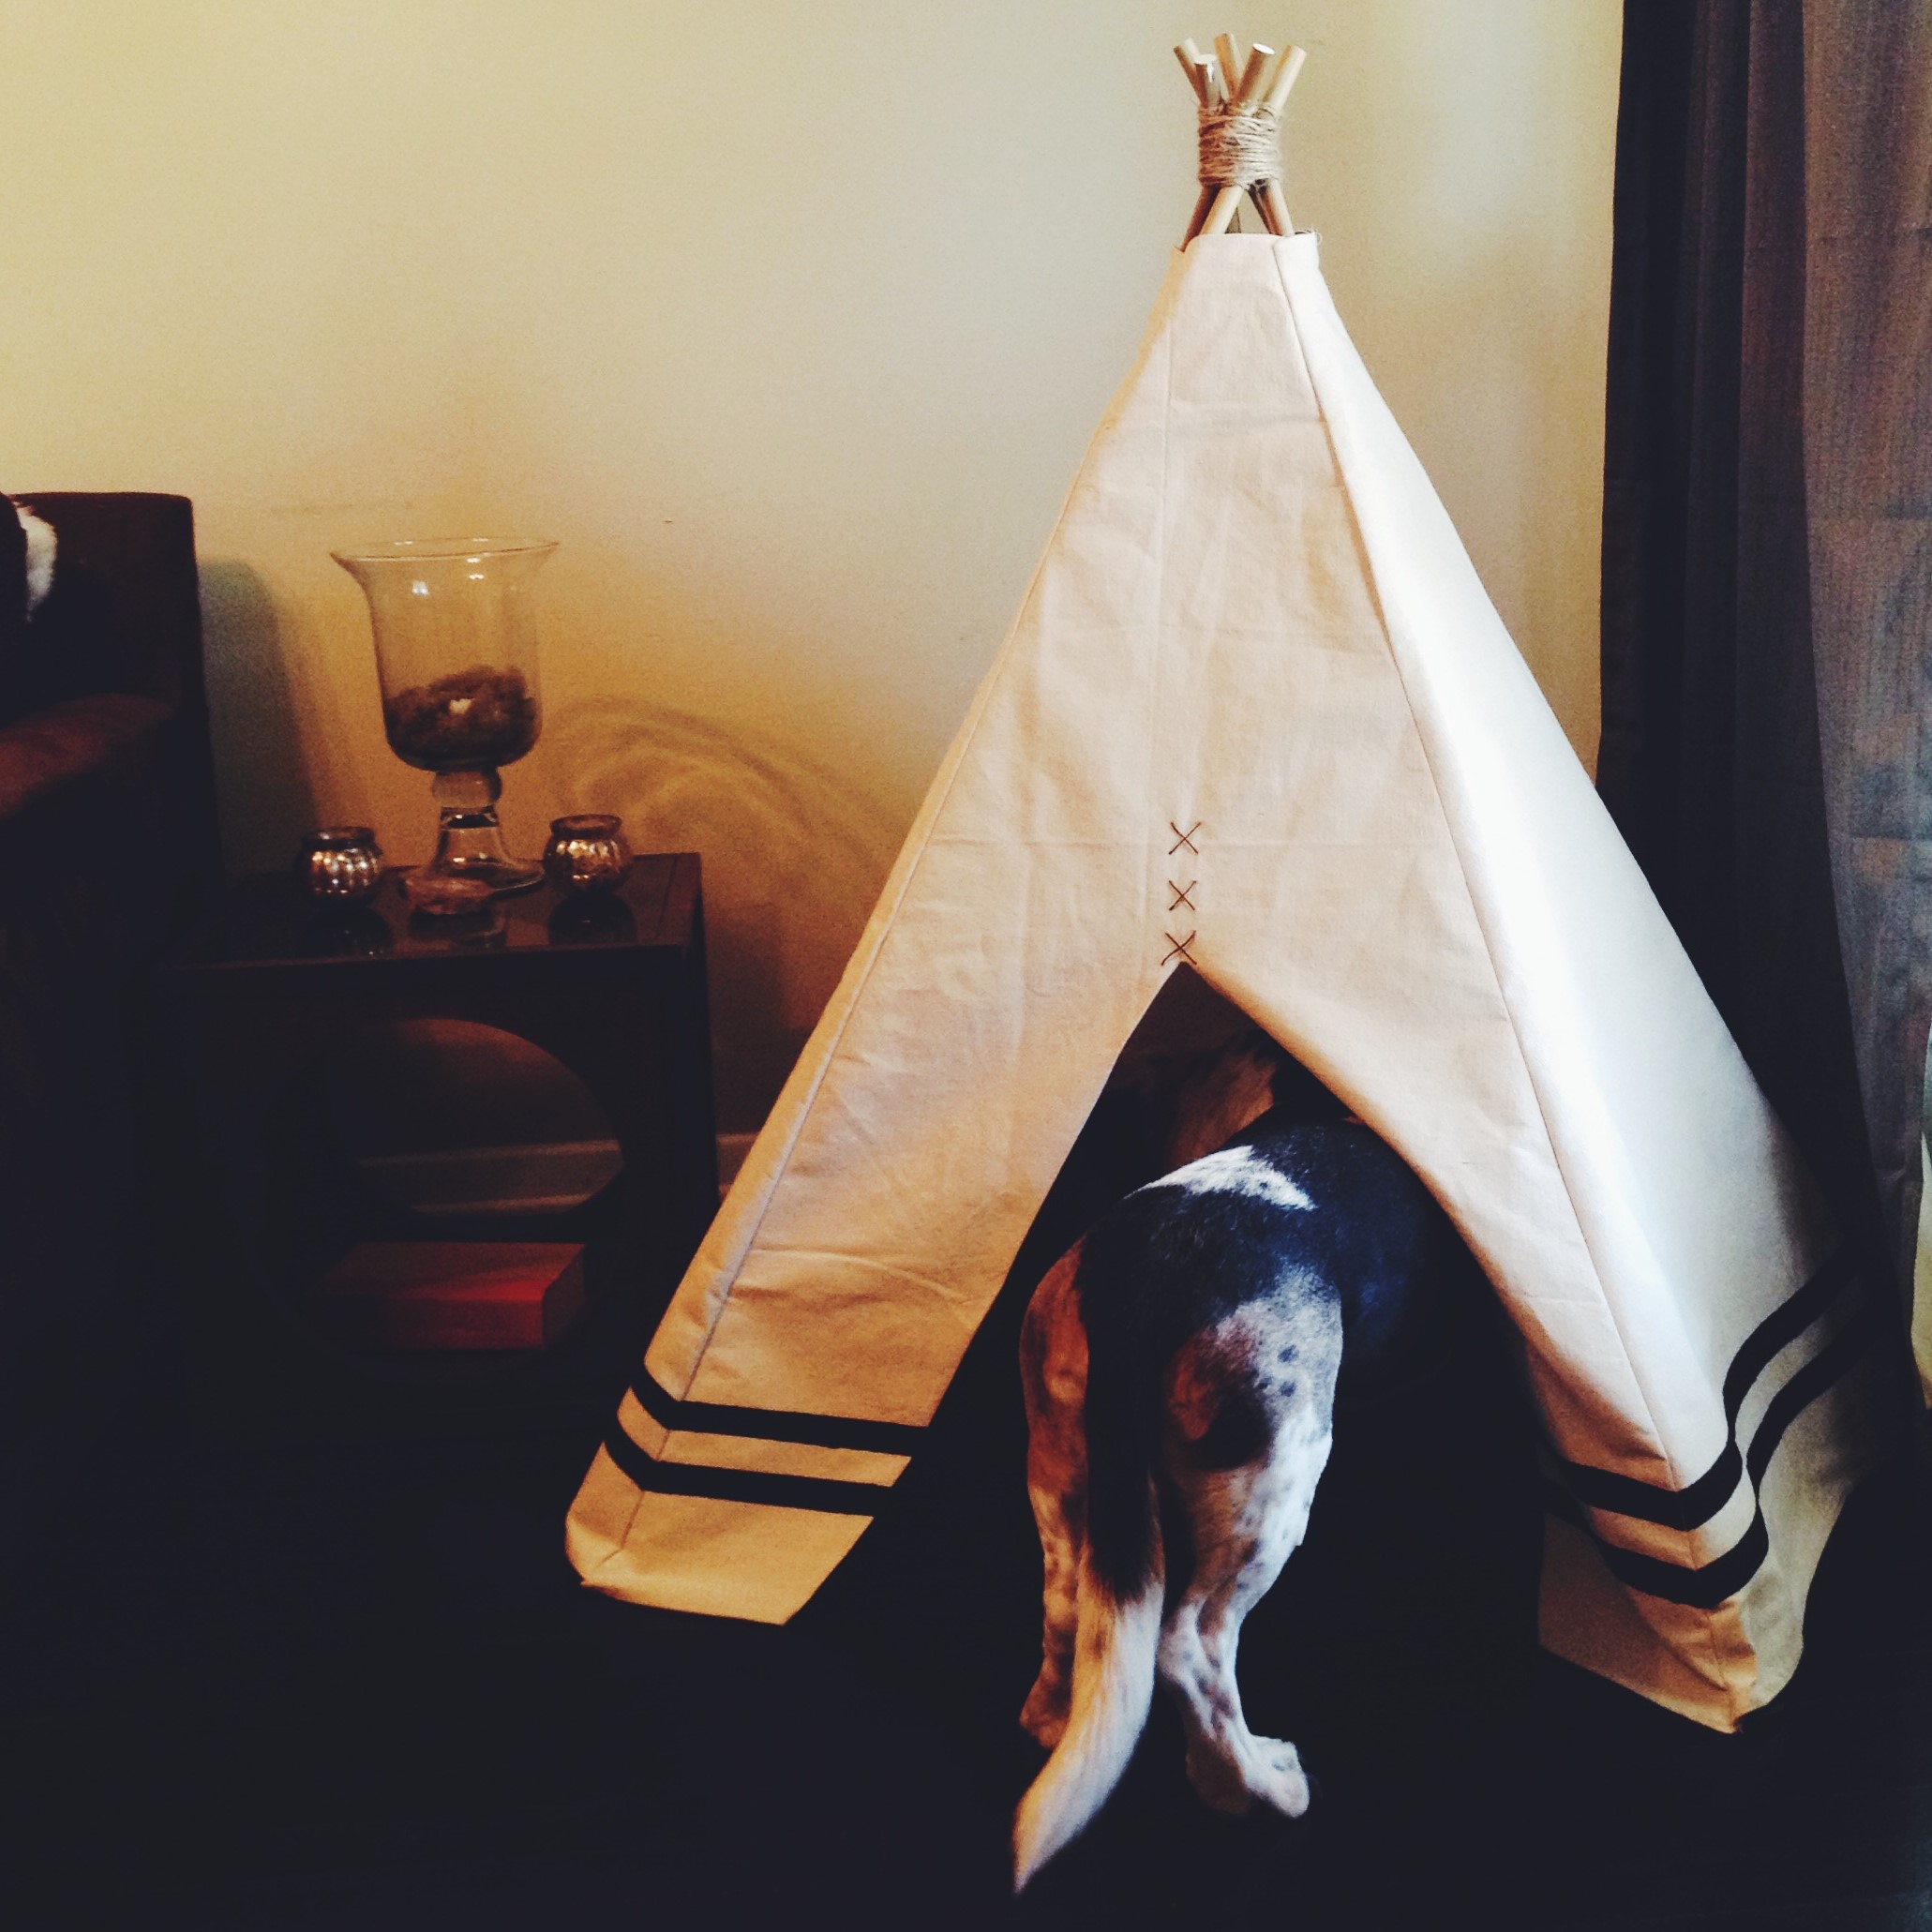
I think it turned out really cute and it looks like Henry likes it too.  Now off to plan for that yurt.


Tagged , , , ,

New Knitting Pattern: Wayfinder Mitts

photo by Nikki Mann

photo by Nikki Mann

I’m excited to announce that my Wayfinder Mitts knitting pattern is now available as a Ravelry download. Worked in Madelinetosh DK, each Wayfinder Mitt is cast on at the bottom edge and knit in the round. The top and bottom cuffs are worked in 2×2 rib, which stretches nicely to fit the wearer. The directional cables flow out of the ribbed cuff and are mirrored on the back of each hand. Thumb gussets are created by increases placed at the side of each mitt; after increasing, thumb stitches are placed on waste yarn and later picked up and worked in the round. Instructions are provided as both charted and written.

photo by Nikki Mann

photo by Nikki Mann

MATERIALS

DK weight wool yarn – approximately 115 yards/106 meters

Sample shown in Madelinetosh Tosh DK (100% superwash merino wool; 225 yards/206 meters/100 g) in the Antique Lace colorway on hands measuring 7.5″/19 cm in circumference.

US 6/4.0 mm (or size needed to obtain gauge) dpns, two circulars, or long circular for magic loop

Cable needle

3 Stitch markers

Tapestry needle for weaving ends

Waste yarn

GAUGE

22 sts by 30 rounds = 4”/10 cm in stockinette stitch

FINISHED SIZE

8”/20.5 cm long by 7”/17.75 cm in circumference (unstretched) to fit hands measuring 6.5″/16.5 cm to 8″/20.25 cm in circumference.

Visit the Ravelry pattern page here or buy now.

photo by Nikki Mann

photo by Nikki Mann

Tagged , , , , , , , , ,

A Crafty Saturday

The Autumnal Equinox arrived this weekend, and here in Texas we finally felt the first break from our 90+ degree heat. Saturday was such a lovely day with temps in the 60s in the morning and peaking in the mid 80s in the afternoon. I met up with some lady friends for a nice brunch and all around crafty day.

9885852825_38079e786c_c

We stopped by The DIME Store, a brick and mortar store born out of the Etsy Denton collective. DIME (Denton Independent Maker Exchange) opened up shop this spring and I have been really wanting to visit and take a peek at their handmade wares.

9885877654_e52d2ddf87_c

These burlap pillows by Home Again were really cute, and even though the “I heart US” is surely referring to the United States, I really loved the idea of a pillow that says “I love Us” referring to the identity of a couple.

9885850035_ddb155568c_c

There were some really adorable bags and clutches made by Rachel Elise that I was too busy drooling over to get a picture of and these cute little knitted baby hats by Cassie Arnold Art.

9885855995_ab2a4e0e5b_c

Afterwards, we went back to my friend Felicia’s house for a little bit of knitting ourselves. Felicia cast on for a Hill Country Hat, and Bri started up a slightly modded version of my Infinity Cowl pattern, having given the one she previously knit away to a good friend.

9885851766_59d0879b2f_c

We had such a good time talking knitting all day and I look forward to seeing their finished knits.

Tagged , , , , , , , , , ,

Ladies’ Domestic Arts Society: DIY Porcelain Mugs

I have quite a few crafty lady-friends and we’ve always talked about getting together and just making stuff- one of us would show the others how to make jewelry, another would teach us all how to sew, another would show us how to bake awesome deserts, and so on and so on.  And so we formed the Ladies’ Domestic Arts Society, a monthly meetup with the sole purpose of making crafty things together. Recently, we gathered at my home and decorated coffee mugs with porcelain pens while catching up on each others’ lives and sipping mimosas. It was a really fabulous time and I’m already looking forward to our next meetup.

LDAS

Tagged , , , ,

Naturally Dyed Eggs For Easter

I made a few more naturally dyed eggs for Easter this year using the same method I used last year. For the purple eggs, I used blueberries and for the orangey-brown I used onion skins and a little added paprika.

20130330-140202.jpg

Tagged , , , , ,

How To: Make a Pom Pom

Oh the pom pom.  I’m seeing them everywhere these days.  They are such a fun way to embellish knits, crafts and even use in home decor. Here’s a simple way to make your own pom poms.

Materials:

Yarn: I find it best to use yarns with plies that don’t unravel- that way your pom won’t have frayed edges.  Wool is my favorite go-to yarn for making poms.  The yarn pictured is Cascade 220.

Cardboard: for making a reusable pom pom template.

Scissors: a sturdy pair that will cut easily though cardboard.

Glass, or a circular object for tracing circles onto cardboard.  Your circle diameter will be the approximate size of your finished pom.  The finished pom shown is around 3 inches in diameter.

Quarter, or other small circular object for tracing smaller circles onto cardboard.

Pen: for tracing

Step One:

Gather all materials listed above.

step1

Step Two:

Trace two large circles onto cardboard using the glass as a guide.

tracing circles 1

Step Three:

Trace a smaller circle in the center of each larger circle using the quarter as a guide.

tracing circles 2

Step Four:

Cut out the cardboard circles, cutting a 1/2 inch wide wedge opening on one side of each circle.

circles

Step Five:

Holding both cardboard circles together, start wrapping the yarn around the circles.  Make sure to cover all of the cardboard and wrap many layers of yarn; the more yarn you use, the fluffier your pom poms will be.

wrapping 1

wrapping3

Step Six:

Once finished wrapping, cut the yarn end.  Cut a length of yarn about 10 inches long and set aside for later.

length of yarn

Step Seven:

Place your thumb in the center of the circle to secure yarn and start cutting the edges of the yarn by guiding the scissors between the two pieces of cardboard.

cutting1

cutting2

Step Eight:

After cutting about half of the yarn, slide the length of yarn you set aside between the two pieces of cardboard to start securing the cut pieces of yarn.  Make sure not to let any cut pieces get loose.  Continue cutting all of the yarn that is wrapped, and tighten the length of yarn around the center, gathering all cut ends tightly.  Tie in a few knots to secure.

secured

secured3

Step Nine:

Remove the cardboard circles and fluff your pom pom into a circular shape.  Trim any long ends.

trimming

Step Ten:

POM IT UP!

pomitup

What will you pom?

Tagged , , , , , ,